
Are you tired of those rough edges and uneven surfaces in your woodworking projects? An orbital sander can be your best friend, transforming your work into a smooth masterpiece.
But to keep it performing at its best, it needs a little TLC. Understanding how to maintain an orbital sander not only extends its lifespan but also ensures that every project you tackle looks professionally finished. Imagine the satisfaction of holding a perfectly polished piece of wood, knowing your sander is working just as it should.
Ready to discover the simple secrets to keeping your tool in top shape? Let’s dive into the essential maintenance tips that will keep your orbital sander running smoothly and efficiently. Keep reading to master the art of sander maintenance and elevate the quality of your work.
Choosing The Right Orbital Sander
Choosing the right orbital sander helps you work better and faster. It also makes your projects look smooth and neat.
There are different types of orbital sanders. Each one fits certain jobs and skill levels.
Types Of Orbital Sanders
Orbital sanders come in several types. Each type uses a different motion to sand surfaces.
Some common types include:
- Random Orbital Sander: Moves in circles and orbits for smooth finish
- Finishing Sander: Uses straight-line motion for fine sanding
- Detail Sander: Small and fits tight corners
Key Features To Look For
Look for features that make sanding easier and safer. These features help you get better results.
- Variable Speed Control: Adjust speed for different materials
- Dust Collection System: Keeps work area clean and safe
- Ergonomic Design: Comfortable to hold for long periods
- Pad Size: Choose size based on project needs
- Power Source: Corded for long use or cordless for mobility
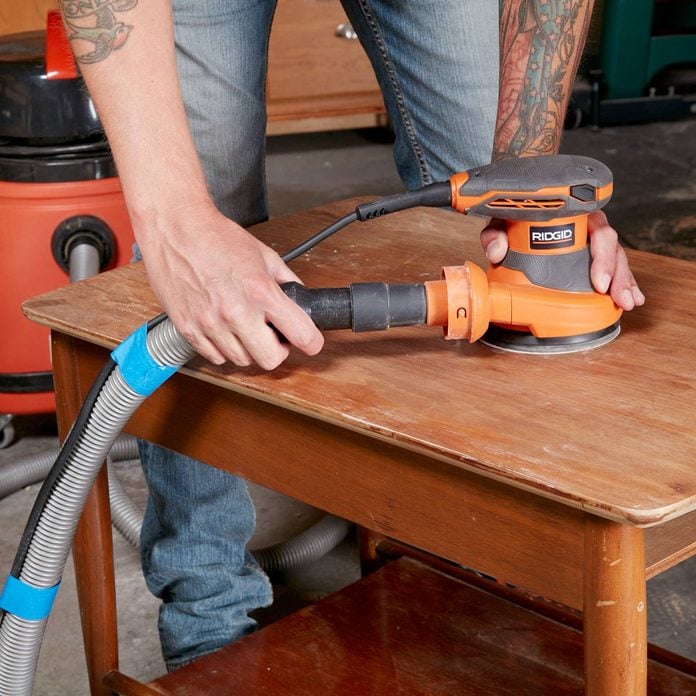
Credit: www.familyhandyman.com
Daily Cleaning Practices
Keeping your orbital sander clean every day helps it work well longer.
Simple daily care stops dirt and dust from causing damage.
Removing Dust And Debris
Dust and debris can block the vents and reduce the sander’s power.
- Turn off and unplug the sander before cleaning.
- Use a soft brush to remove dust from vents and moving parts.
- Blow compressed air gently to clear tight spots.
- Empty the dust bag or container after every use.
- Check the sanding pad for stuck debris and clean it carefully.
Wiping Down The Exterior
Wiping the outside removes dirt that can cause wear or slip hazards.
| Tool Part | Cleaning Method |
| Body | Use a damp cloth to wipe dust and dirt |
| Handle | Clean with a mild soap solution and dry well |
| Power Cord | Inspect and wipe with a dry cloth to remove dust |
| Switch | Use a dry brush to clear around the switch |
Inspecting And Replacing Pads
Keeping your orbital sander pads in good shape helps you get better results. Pads wear out with use and need regular checks. Replacing pads at the right time saves your tool and work surface.
Inspecting pads is simple. Look for damage or loss of grip. Replacing pads is easy and keeps your sander working well. This guide shows you how to check and change pads safely.
Signs Of Worn-out Pads
You can spot worn-out pads by checking their surface and performance. Pads that are damaged or no longer stick well need to be replaced. Using worn pads can damage your work and sander.
- Pad surface looks torn or frayed
- Sanding paper slips or falls off
- Uneven sanding marks on your workpiece
- Excessive vibration during sanding
- Pad feels hard or cracked
How To Change Sanding Pads
Changing sanding pads is quick and does not need special tools. Make sure the sander is unplugged before you start. Follow these steps to replace the pad correctly.
- Remove old sanding paper from the pad
- Unscrew or release the pad from the sander
- Clean the sander’s base to remove dust and debris
- Attach the new pad by aligning holes or hooks
- Secure the pad tightly with screws or locking mechanism
- Stick new sanding paper onto the new pad
- Check that the pad is firmly attached before use

Credit: www.klium.com
Lubrication And Moving Parts
Maintaining an orbital sander helps it last longer and work well. Lubrication keeps the moving parts running smoothly.
Without proper care, parts can wear out or get stuck. Regular lubrication stops this damage.
Areas Needing Lubrication
Focus on parts that move a lot and cause friction. These include bearings, gears, and shafts inside the sander.
Check the user manual for specific spots. Some common areas are the orbital pad and motor bearings.
- Orbital pad bearings
- Motor shaft and bearings
- Gear mechanisms inside the housing
- Pivot points where parts rotate
Recommended Lubricants
Use lubricants made for power tools. These reduce wear and keep parts cool.
A light machine oil or grease works well. Avoid thick oils that can clog parts.
- Light machine oil for bearings
- Silicone-based grease for gears
- Non-detergent oil for shafts
- Dry lubricants if dust is a problem
Checking Electrical Components
Maintaining the electrical parts of your orbital sander is important for safety and good performance. Faulty electrical components can cause accidents or stop the tool from working.
Regular checks help find problems early. This guide covers inspecting power cords and testing switches and controls.
Inspecting Power Cords
Look over the power cord for any damage before each use. Damage can cause electrical shorts or shocks. Check for cuts, cracks, or exposed wires.
- Unplug the sander before inspecting the cord.
- Run your fingers along the cord to feel for cracks or stiffness.
- Look for any burn marks or melted spots.
- Check the plug for bent or broken prongs.
- Make sure the cord is firmly attached to the sander.
If you find any damage, do not use the sander. Replace the cord or have a professional fix it.
Testing Switches And Controls
Switches and controls should work smoothly and respond correctly. Faulty switches can cause the sander to start or stop unexpectedly.
| Check | What to Look For | Action |
|---|---|---|
| Power switch | Clicks firmly when pressed; no sticking | Replace if loose or unresponsive |
| Speed control (if available) | Adjusts smoothly; changes motor speed | Clean or repair if stiff or non-functional |
| Lock-on button | Engages and releases properly | Fix or replace if stuck or broken |
Storage Tips For Longevity
Keeping your orbital sander in good shape starts with proper storage. Good storage stops damage and helps the tool last longer.
Store your sander carefully to avoid problems like rust or dust build-up. This guide shows simple ways to store your tool right.
Ideal Storage Conditions
Store your orbital sander in a cool, dry place. Avoid places that get very hot or cold. Extreme temperatures can harm the tool’s parts.
Keep the sander away from direct sunlight. Sunlight can cause plastic parts to crack and fade. A stable spot helps the tool stay in top shape.
- Choose a temperature between 50°F and 80°F (10°C to 27°C)
- Pick a dry area to prevent rust
- Use a storage box or cabinet to protect from damage
Protecting Against Moisture And Dust
Moisture can cause rust and damage to your sander’s motor. Dust can clog moving parts and reduce its power. Protect your tool from both.
Use a clean cloth to wipe the sander before storing it. Cover the tool with a plastic bag or cloth cover to keep dust out.
- Keep the tool dry to stop rust
- Clean dust off after each use
- Store in a sealed container or cover
- Check the tool regularly for dirt or moisture
Troubleshooting Common Issues
Orbital sanders are useful tools but can face common problems. Knowing how to fix these issues saves time and money.
This guide covers two typical problems: overheating and unusual vibrations. Follow the tips to keep your sander working well.
Dealing With Overheating
Overheating can damage your orbital sander and reduce its lifespan. It usually happens from heavy use or poor ventilation.
- Check if the air vents are blocked by dust or debris.
- Clean the vents with compressed air or a soft brush.
- Reduce sanding pressure to avoid stressing the motor.
- Take breaks during long sanding sessions to cool the tool.
- Use the correct sanding pad and grit for your project.
- Inspect the power cord and plug for any damage.
If overheating continues, consider having a technician check the motor brushes or internal parts.
Fixing Unusual Vibrations
Unusual vibrations can make sanding harder and cause uneven results. It often means parts are loose or worn out.
| Cause | Solution |
| Loose sanding pad | Tighten or replace the pad |
| Worn bearings | Replace bearings or service the motor |
| Imbalanced or damaged sanding disc | Use a new, balanced disc |
| Loose screws or bolts | Check and tighten all fasteners |
| Internal motor issues | Have a professional inspect the tool |
Regular maintenance helps avoid vibration problems. Clean and check your sander often for the best performance.
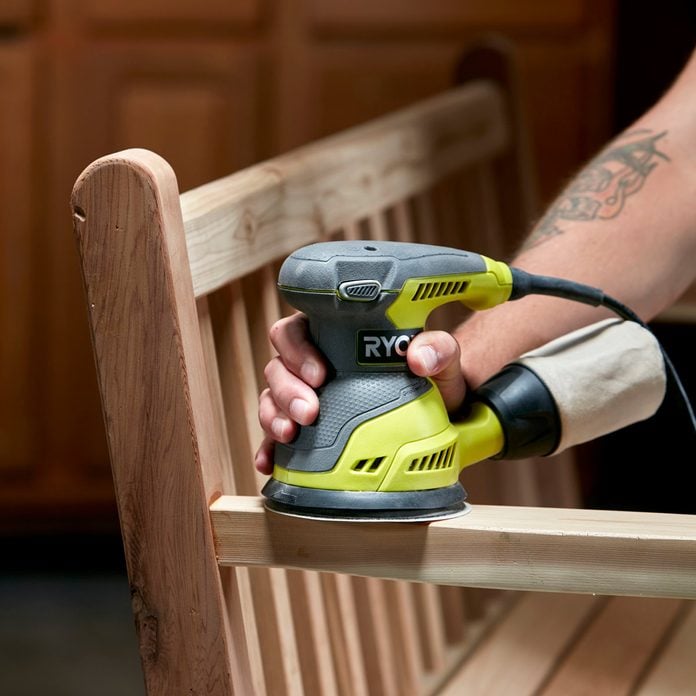
Credit: www.familyhandyman.com
Frequently Asked Questions
How Often Should I Clean My Orbital Sander?
Clean your orbital sander after every use. Remove dust and debris from the sanding pad and vents. Regular cleaning ensures optimal performance and extends the tool’s lifespan.
What Type Of Sandpaper Works Best For Orbital Sanders?
Use hook-and-loop sandpaper designed for orbital sanders. Choose grit based on your project needs, from coarse to fine. Proper sandpaper improves sanding quality and tool efficiency.
How Do I Replace The Sanding Pad On An Orbital Sander?
Turn off and unplug the sander first. Remove the old pad by loosening screws or detaching hook-and-loop backing. Attach the new pad securely before use.
Why Is My Orbital Sander Overheating During Use?
Overheating often results from clogged dust vents or excessive pressure. Clean dust collection ports regularly and avoid pushing too hard on the sander. Proper use prevents motor damage.
Conclusion
Regular care keeps your orbital sander working well. Clean dust and debris after each use. Check the sanding pads for wear and replace them on time. Tighten loose parts to avoid damage. Store the sander in a dry, safe place.
Small steps like these save money and time. Enjoy smooth sanding results every time you work. Keep your tool ready for the next project. Simple maintenance makes a big difference.
